ADT Alarm Battery Change: Technician Advice Inside
Your ADT security system is one of your home’s most critical defense mechanisms against unauthorized intrusions and emergencies. However, like all electronic devices, the backup battery powering your alarm system requires regular maintenance and eventual replacement. A dead or dying battery compromises your entire security infrastructure, leaving your property vulnerable when power outages occur. Understanding when and how to replace your ADT alarm battery is essential knowledge for any homeowner relying on this protection.
Battery degradation is a silent threat that many ADT users overlook until their system fails during a critical moment. Modern ADT systems typically use 12-volt sealed lead-acid batteries or lithium-ion alternatives, each with specific replacement procedures and compatibility requirements. This comprehensive guide walks you through the technical aspects of ADT alarm battery replacement, warning signs that indicate your battery needs attention, and best practices recommended by security professionals.
Understanding Your ADT Alarm Battery System
Your ADT security system relies on a backup battery to maintain functionality during power interruptions. This critical component ensures that your security monitoring capabilities continue even when the main electrical supply fails. The battery serves as a failsafe mechanism, keeping your panel, sensors, and communication devices operational during blackouts lasting anywhere from minutes to several hours.
The backup battery is typically housed within your ADT control panel or in a separate battery enclosure nearby. Its primary function is powering the system’s memory, keypad display, and wireless communication protocols that maintain contact with ADT’s monitoring centers. Without a functioning battery, your system cannot send distress signals during emergencies, rendering your professional monitoring service ineffective.
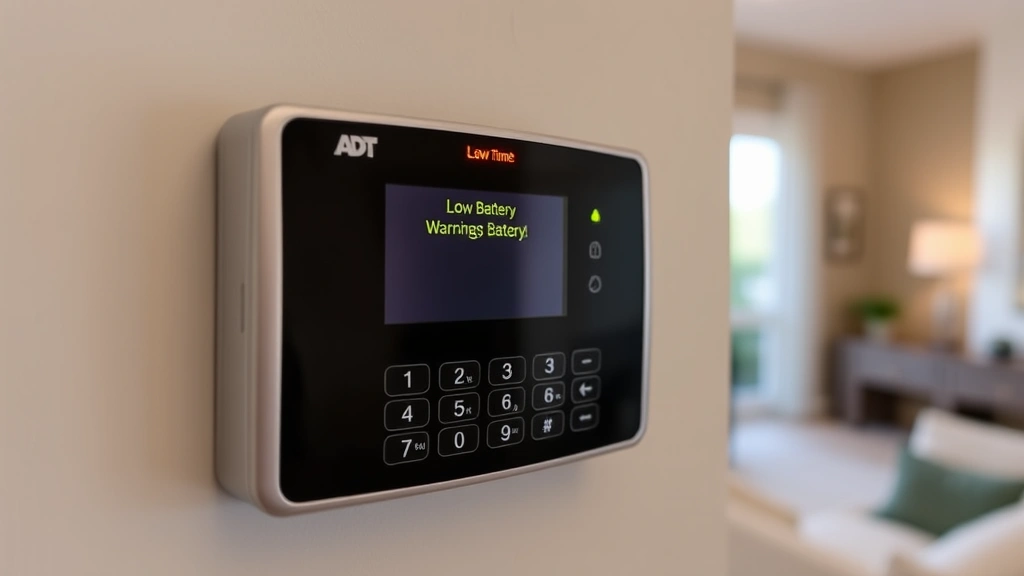
ADT systems commonly feature intelligent battery monitoring technology that tracks voltage levels and battery health continuously. When your battery begins degrading, your control panel displays warning messages and may trigger low-battery alerts. These warnings represent your system’s attempt to notify you that replacement is imminent. Ignoring these alerts increases the risk of complete battery failure at an inconvenient moment.
Understanding your specific system’s battery specifications is crucial before attempting replacement. Different ADT models use different battery types, capacities, and connector configurations. Consulting your system’s documentation or contacting ADT directly ensures you purchase the correct replacement unit compatible with your equipment.
Signs Your Battery Needs Replacement
Recognizing early warning signs prevents security gaps caused by battery failure. Your ADT system provides several indicators that battery replacement is approaching:
- Low Battery Warning: Your control panel displays “Low Battery” or similar alerts on the keypad display. This is your system’s primary warning mechanism and should never be ignored.
- Chirping Sounds: Many ADT panels emit periodic chirping noises when battery voltage drops below safe thresholds. This audible alert persists until the battery is replaced.
- Panel Display Issues: Dimming keypad displays, flickering lights, or inconsistent backlight brightness indicate declining battery voltage.
- Failed System Tests: When running system diagnostic tests, failures related to backup power indicate battery problems.
- Age-Related Degradation: Batteries typically last 3-5 years depending on usage patterns and environmental conditions. If your battery is older than three years, proactive replacement prevents unexpected failures.
- Inability to Arm System: Some ADT models prevent arming when battery voltage falls below minimum thresholds as a safety protocol.
Environmental factors accelerate battery degradation. Extreme temperatures, high humidity, and proximity to heat sources reduce battery lifespan significantly. If your ADT panel is located in an attic, garage, or basement exposed to temperature fluctuations, expect battery replacement sooner than systems installed in climate-controlled environments.
Types of ADT Batteries and Specifications
ADT utilizes several battery types across their product lineup. Identifying your specific battery type ensures compatible replacement:
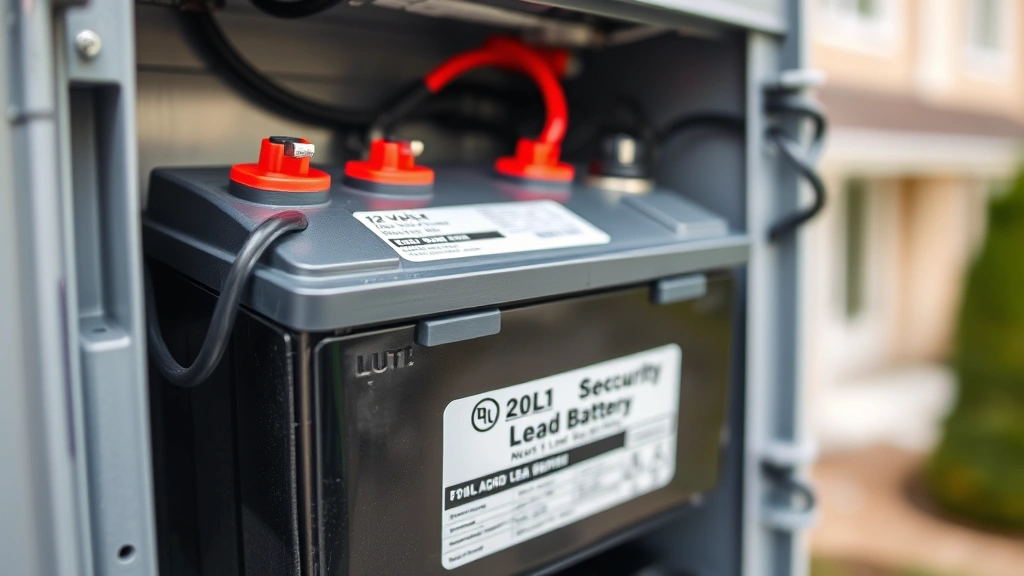
12V Sealed Lead-Acid Batteries: These traditional batteries remain the industry standard for home security systems. Common capacities include 7Ah (amp-hour), 10Ah, and 12Ah ratings. Higher amp-hour ratings provide longer backup runtime during extended outages. These batteries feature two terminal posts for connection and weigh significantly more than lithium alternatives.
Lithium-Ion Batteries: Newer ADT systems increasingly use lithium-ion technology offering superior performance characteristics. These batteries charge faster, maintain consistent voltage output, and last longer than lead-acid alternatives. However, they cost more initially and require specific charging protocols to prevent damage.
Battery Backup Units: Some ADT installations use dedicated battery backup units separate from the control panel. These external enclosures house larger capacity batteries providing extended runtime during outages. Professional installation is often recommended for these systems due to their complexity.
Before purchasing replacement batteries, verify your system’s exact model number and consult the original documentation or ADT’s online resources. Many ADT retailers provide battery compatibility checkers allowing you to input your system model and receive accurate product recommendations. Purchasing incorrect batteries wastes money and leaves your system vulnerable.
Step-by-Step Replacement Process
Replacing your ADT alarm battery involves several critical steps requiring careful attention to detail:
Step 1: Disarm Your System
Before touching any internal components, disarm your ADT system completely using your security code. This prevents accidental alarm triggers during the replacement process. Allow the system to fully power down before proceeding.
Step 2: Locate the Battery
The battery location varies by ADT model. Most residential systems house the battery inside the main control panel, accessible by opening the panel’s front door or removing a service cover. Some systems feature batteries in separate enclosures mounted nearby. Consult your system’s documentation for precise location information.
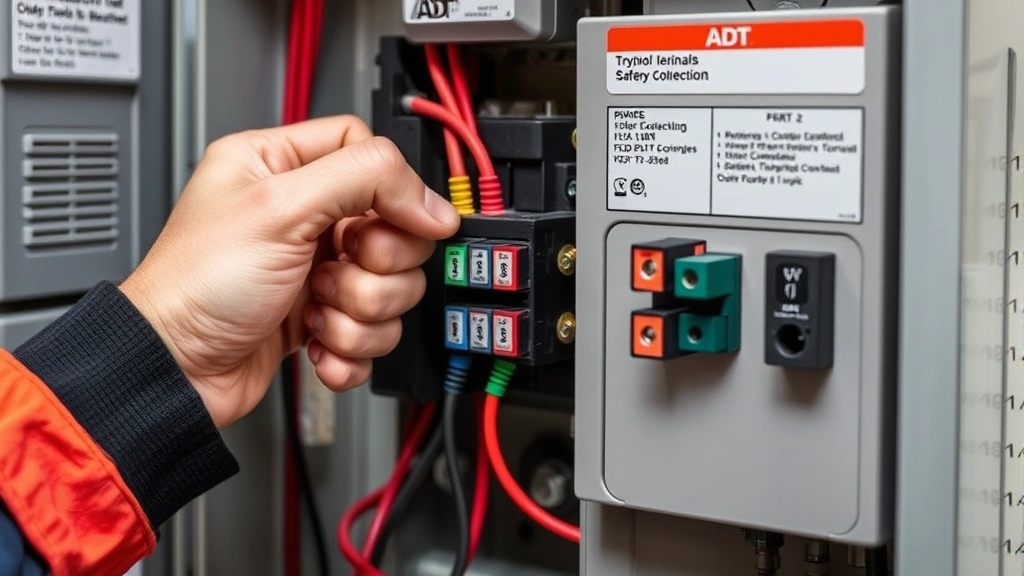
Step 3: Document Current Connections
Before disconnecting anything, photograph the battery’s terminal connections. This reference image prevents incorrect reconnection during reinstallation. Note the positive and negative terminal positions carefully.
Step 4: Disconnect the Old Battery
Gently disconnect the negative terminal first, followed by the positive terminal. This sequence prevents electrical shorts and damage to sensitive panel components. Do not allow the terminals to touch each other or the metal panel chassis.
Step 5: Remove the Old Battery
Carefully lift the old battery from its mounting location. Some batteries feature mounting brackets or straps requiring removal before the battery can be extracted. Handle the battery carefully to avoid spilling any electrolyte if it’s a lead-acid type.
Step 6: Install the New Battery
Place the new battery in the identical location, ensuring it sits securely in any mounting brackets. Verify the battery orientation matches the old unit’s position.
Step 7: Reconnect Terminals
Connect the positive terminal first, followed by the negative terminal. This sequence is opposite from disconnection and protects circuit components. Ensure terminals are tight and secure with no exposed metal contact points.
Step 8: Test the System
Power on your ADT system and run diagnostic tests to verify proper battery recognition and charging. Your control panel should display normal status with no low-battery warnings.
Professional vs. DIY Replacement
Deciding whether to replace your battery yourself or contact professional technicians depends on several factors:
DIY Replacement Advantages: Cost savings represent the primary advantage, as professional service calls typically charge $100-300 for battery replacement. If you’re comfortable with basic electrical work and your system’s documentation is clear, DIY replacement is straightforward. Many homeowners successfully complete this task without complications.
DIY Replacement Disadvantages: Incorrect installation can damage your control panel or create security vulnerabilities. If your system is under warranty, DIY replacement might void coverage. Additionally, if complications arise during replacement, you’ll need professional assistance anyway, resulting in higher overall costs.
Professional Replacement Advantages: Certified ADT technicians bring expertise, proper tools, and warranty protection. They verify correct battery type and installation, test system functionality comprehensively, and address any complications immediately. Professional service ensures your security system operates optimally following replacement.
Professional Replacement Disadvantages: Service fees and scheduling delays are primary drawbacks. Emergency replacement calls often incur premium charges. However, many ADT customers find the peace of mind and warranty benefits justify the expense.
Consider your technical comfort level, system complexity, and warranty status when making this decision. If you’re uncertain about any aspect of the replacement process, professional service is the safer choice.
Maintenance Tips for Battery Longevity
Proper maintenance extends your ADT battery’s lifespan and prevents premature replacement:
- Environmental Control: Keep your control panel in climate-controlled environments when possible. Extreme temperatures accelerate battery degradation significantly. If your system is in a garage or attic, consider installing temperature regulation devices.
- Regular Testing: Run system diagnostic tests monthly to monitor battery health. Early detection of declining performance allows proactive replacement before complete failure.
- Clean Terminal Connections: Dust and corrosion on battery terminals reduce charging efficiency. Use a soft, dry cloth to clean terminal connections quarterly.
- Verify Charging: Ensure your control panel’s charging circuit functions properly. A malfunctioning charger causes premature battery failure regardless of battery quality.
- Avoid Overcharging: Modern ADT systems feature intelligent charging management, but verify your panel doesn’t overcharge the battery. Overcharging reduces lifespan and creates safety hazards.
- Keep Records: Document battery replacement dates and any low-battery alerts. This history helps identify patterns and predict future replacement needs.
Troubleshooting Common Battery Issues
Even with proper maintenance, battery problems occasionally occur. Common issues and solutions include:
Low Battery Warning Persists After Replacement: If your system still displays low-battery warnings after installing a new battery, the control panel’s charging circuit may be defective. Contact ADT technical support or consult a certified technician to diagnose charging system problems.
Battery Not Recognized by System: Verify terminal connections are secure and correct. Try disconnecting and reconnecting the battery, ensuring positive and negative terminals are properly aligned. If the system still doesn’t recognize the battery, the battery or panel connector may be damaged.
Rapid Battery Drain: If your new battery drains quickly despite proper charging, a system component may be drawing excessive current. This typically indicates a circuit problem requiring professional diagnosis and repair.
Physical Battery Damage: Swelling, leaking, or visible damage indicates the battery is defective. Stop using the battery immediately and request replacement through your retailer’s warranty program.
System Won’t Power On: After battery replacement, if your system fails to power on, verify the control panel is connected to AC power. Check circuit breakers and power outlet functionality. If power is confirmed but the system won’t activate, contact ADT support.
For persistent issues beyond these basic troubleshooting steps, professional diagnostic services are necessary. Attempting complex repairs without proper training risks further damage to your security system.
Your ADT security system’s reliability depends on proper battery maintenance and timely replacement. By understanding your system’s battery requirements, recognizing warning signs, and following replacement procedures carefully, you ensure continuous protection for your home. Whether you choose DIY replacement or professional service, prioritizing battery health maintains the security infrastructure protecting your family and property from threats.