ADT Security Panel Battery Change: Expert Guide
Your ADT security panel serves as the nerve center of your home protection system, and maintaining it is critical to ensuring continuous security coverage. One of the most important maintenance tasks is regularly changing the backup battery in your ADT security panel. A depleted or failing battery can compromise your system’s ability to function during power outages, leaving your home vulnerable to intrusions and disabling critical alert capabilities. Understanding how to properly replace this battery is essential knowledge for any ADT customer who wants to maintain optimal system performance and reliability.
The backup battery in an ADT security panel is designed to keep your system operational for a limited period during electrical outages, allowing your panel to continue monitoring and transmitting signals to the monitoring center. Over time, these batteries degrade and lose their ability to hold a charge, which is why regular replacement is necessary. This comprehensive guide will walk you through everything you need to know about ADT security panel battery replacement, from identifying when a battery change is needed to executing the replacement safely and correctly.
Understanding Your ADT Security Panel Battery
ADT security panels utilize rechargeable backup batteries, typically lithium-ion or sealed lead-acid types, depending on your specific panel model. These batteries are continuously trickle-charged by your system when AC power is available, maintaining a full charge so they’re ready to provide emergency backup power immediately when needed. The capacity of these batteries varies by model, but most can sustain basic monitoring functions for 24 to 48 hours during a complete power outage.
The battery serves multiple critical functions within your ADT system. During normal operation with AC power present, it charges silently in the background. When electricity fails, the battery automatically activates, powering the panel’s communication modules, sensors, and alert mechanisms. This ensures that even without grid power, your system can still detect intrusions, send signals to the monitoring center, and trigger alarms. Additionally, the battery maintains system memory, preserving your programmed settings and alert history even during extended outages.
Different ADT panel models house batteries in different locations. Some panels have batteries mounted directly on the main circuit board, while others feature external battery modules connected via cables. Familiarizing yourself with your specific model’s configuration before beginning any replacement work is essential. You can find this information in your original installation documentation or by contacting ADT customer support directly.
Signs Your Battery Needs Replacement
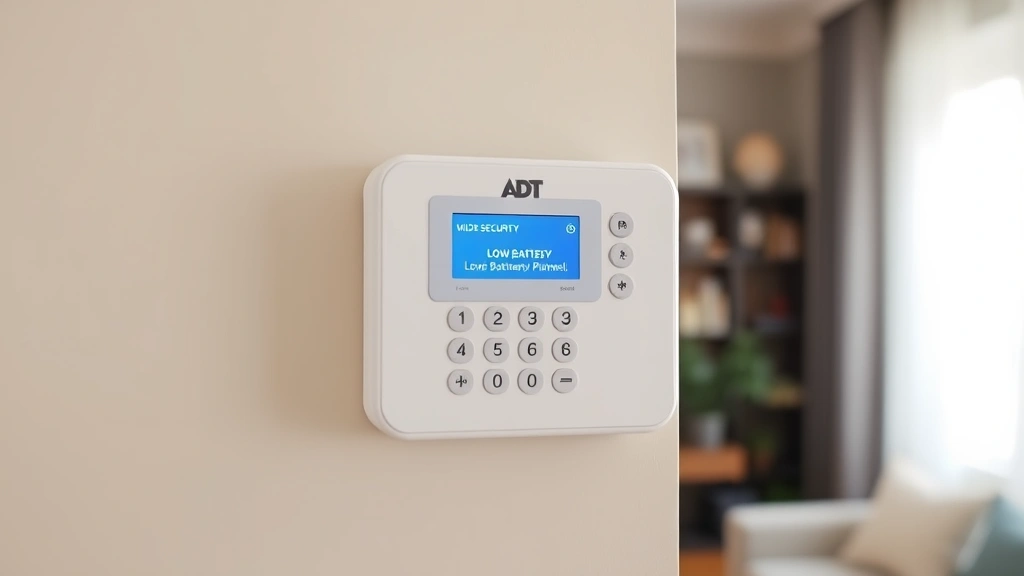
Recognizing when your ADT security panel battery requires replacement is crucial for maintaining system reliability. One of the most common indicators is a low battery warning message displayed on your panel’s keypad. This message typically appears when the battery charge drops below a certain threshold, usually around 20 percent capacity. ADT systems are designed to alert you proactively, giving you time to schedule a replacement before complete battery failure occurs.
Another telltale sign is the failure of your system to maintain power during a brief electrical outage. If you experience a power cut and your panel shuts down immediately instead of continuing to operate, this strongly suggests a deteriorated battery. Additionally, if your panel is several years old—most ADT batteries last between 3 to 5 years depending on usage patterns and environmental conditions—it’s wise to consider proactive replacement even without obvious warning signs.
Listen for audible indicators as well. Some ADT panels emit a periodic beeping sound when the battery is failing or needs attention. This acoustic alert, combined with any visual warnings on your keypad display, should prompt immediate action. Some users also notice their panel becoming warm to the touch, which can indicate a battery struggling to maintain charge or experiencing internal degradation.
Tools and Materials You’ll Need
Before beginning your battery replacement, gather all necessary tools and materials to ensure a smooth, uninterrupted process. You’ll need the replacement battery itself—make absolutely certain you purchase the correct model for your specific ADT panel. Check your documentation or contact ADT support to verify the exact battery part number required. Using an incorrect battery can damage your panel or result in improper charging and reduced backup power capacity.
Essential tools include a Phillips head screwdriver for removing panel covers and internal fasteners, and potentially a flathead screwdriver for prying open battery compartments. A small flashlight or headlamp proves invaluable for illuminating internal panel components, especially if your panel is mounted in a dark location. Have a soft cloth or anti-static mat available to protect sensitive electronics during the replacement process.
Keep your ADT system documentation nearby for reference, including the user manual specific to your panel model. You’ll also want to have your ADT account information readily available in case you need to contact support. A notepad for documenting your panel’s current settings before beginning work is highly recommended, as is having your security code written down in a secure location separate from the work area.
Step-by-Step Battery Replacement Process
Begin by disarming your ADT security system completely. Enter your security code and select the disarm option to ensure no accidental alarms trigger during your maintenance work. This is critical for both safety and to prevent false alerts being sent to the monitoring center. Once disarmed, locate the main power switch on your panel—typically found on the back or side of the unit—and switch it to the OFF position.
Next, unplug the panel’s AC power adapter from the wall outlet. Wait approximately 30 seconds before proceeding. This brief waiting period ensures any residual charge in the system dissipates safely. When working with the battery, take precautions against static electricity by wearing an anti-static wrist strap or regularly touching a grounded metal surface.
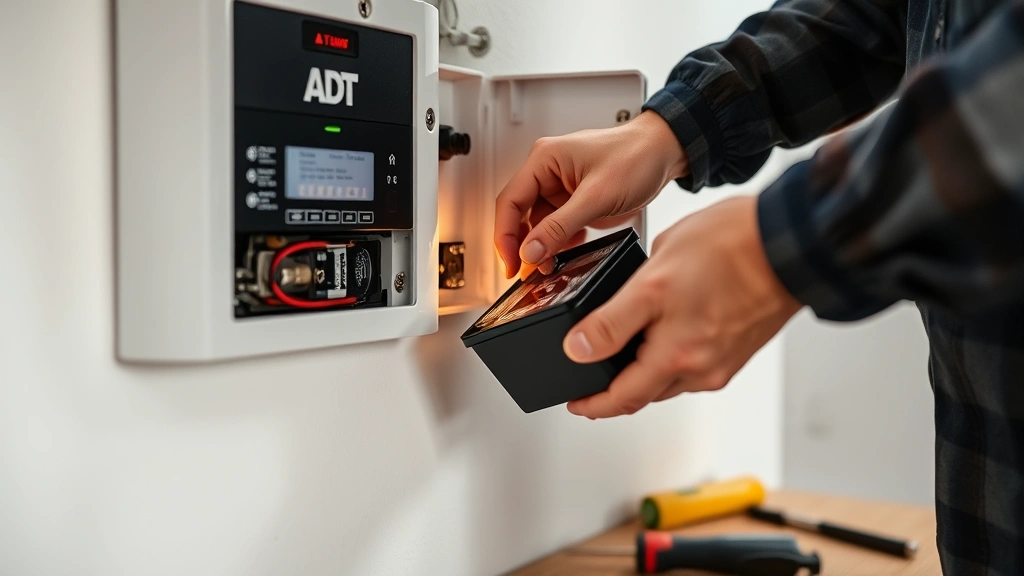
Locate the battery compartment on your specific ADT panel model. This may require removing an external cover or accessing an internal bay. Carefully disconnect any cables attached to the old battery, noting their configuration so you can replicate the connections precisely with the new battery. Take a photograph with your phone if helpful for reference.
Remove the old battery by gently pulling it from its mounting bracket or bay. Some batteries are held with velcro strips, while others use plastic clips or screws. Handle the battery carefully even though it’s being replaced—lithium-ion batteries particularly should never be dropped or subjected to physical stress. Place the old battery in a safe location for proper recycling later.
Insert the new battery into the same position, ensuring it sits securely in its mounting bracket or bay. Reconnect the cables in the exact same configuration as before, double-checking polarity if the connections are not keyed. Positive and negative terminals must match the original configuration precisely, or your system may not charge properly.
Once the battery is installed and connected, plug the AC power adapter back into the wall outlet. Switch the main power switch back to ON. Your panel should initialize and display startup screens. Allow it approximately 2-3 minutes to fully boot and calibrate. You may see low battery warnings initially, which is normal—the new battery will charge over the next 24 to 48 hours to full capacity.
Finally, re-arm your ADT security system using your security code. Test each zone to ensure all sensors are communicating properly with the panel. The system should return to normal operation with all indicator lights showing green or their normal states.
Safety Precautions and Best Practices
Working with security system components requires adherence to important safety protocols. Never attempt battery replacement while the system is armed, as this can trigger alarms and create safety hazards. Always ensure the AC power is completely disconnected before beginning any internal work. Some ADT panels maintain a capacitor charge even after power disconnection, so waiting the recommended 30 seconds allows this to safely dissipate.
Avoid touching circuit boards or internal components with bare hands whenever possible. Static electricity from your body can damage sensitive electronics. Wear an anti-static wrist strap connected to a grounded surface, or regularly touch a metal part of the panel frame to discharge any static buildup. Never force any components or connections—if something doesn’t fit easily, stop and verify you have the correct battery model.
If your panel uses a sealed lead-acid battery, be aware that these contain sulfuric acid and require careful handling. Never attempt to open or modify a sealed battery, and dispose of old batteries according to local regulations. Many retailers that sell batteries accept old ones for proper recycling. If you experience any difficulty during replacement, contact ADT support rather than forcing components—their technicians can provide specific guidance for your model.
Keep the work area organized and free of clutter. Have a small container to hold screws and fasteners as you remove them, preventing loss or accidental damage. Work in good lighting and avoid rushing through the process. Taking time to do the job correctly ensures your security system will function reliably for years to come.
Testing Your System After Replacement
After completing the battery replacement and re-arming your system, comprehensive testing is essential to verify everything functions correctly. Begin by testing each zone individually. Walk around your home and trigger each door and window sensor to confirm they communicate with the panel. You should see corresponding zone indicators light up on your keypad, and the panel should register each trigger in its event log.
Test your motion sensors by walking through monitored areas. Your panel should detect movement and register zone activations. Pay special attention to any zones that previously had issues, as these may reveal problems that require adjustment or additional service. If any zone fails to register, check the battery connections again and verify the sensor itself hasn’t been damaged.
Perform a system test call to ADT’s monitoring center. This confirms that your panel can still communicate with the monitoring service and that battery backup hasn’t affected signal transmission. ADT can initiate this test remotely, or you can request it through your online account portal. Receiving confirmation that the test signal was received successfully provides peace of mind that your monitoring service remains active.
Monitor your panel’s battery indicator over the next 24 to 48 hours. You should see the battery charge percentage gradually increase as the new battery charges. If the battery charge remains low or fails to increase, this may indicate a connection problem or a defective replacement battery. In such cases, contact ADT support immediately for assistance.

Troubleshooting Common Issues
If your panel fails to power on after battery replacement, verify that the AC adapter is properly plugged in and that the outlet itself is functioning. Test the outlet with another device to confirm power availability. Check that the main power switch is in the ON position. If the panel still won’t power on, the battery connections may be incorrect—disconnect and reconnect them carefully, ensuring proper polarity.
Low battery warnings that persist after 48 hours of charging may indicate a defective new battery. Some batteries arrive with manufacturing defects that prevent proper charging. Contact the retailer or manufacturer for a replacement. If charging issues occur, verify that your AC power connection is stable and that no circuit breakers in your home have tripped.
If specific zones fail to respond after battery replacement, the issue likely isn’t battery-related but rather a sensor that became disconnected during your work. Verify all internal cable connections are secure. If a sensor remains unresponsive, check that sensor’s batteries as well—replacing the panel battery is a good time to also replace sensor batteries if they’re aging.
In cases where your panel displays error codes or behaves unexpectedly after replacement, consult your user manual for code meanings or contact ADT support. Providing them with the specific error code and a description of the issue will help them diagnose the problem quickly. Many issues can be resolved with simple software resets or recalibration procedures that ADT can guide you through remotely.
FAQ
How often should I replace my ADT security panel battery?
Most ADT backup batteries last between 3 to 5 years under normal conditions. However, factors like temperature fluctuations, frequent power outages, and system usage patterns can shorten battery lifespan. Monitor your panel’s low battery warnings and replace the battery promptly when alerted. Proactive replacement every 4 years is recommended even without warning signs.
Can I replace the battery myself, or should I call ADT?
Most ADT customers can safely replace the battery themselves by following proper procedures. However, if you’re uncomfortable working with electronics or your specific panel model has complex internal configurations, ADT technicians can handle the replacement professionally. Check your service agreement to see if battery replacement is covered.
What happens if my battery dies completely?
If your battery completely fails during a power outage, your panel will lose power and cease all monitoring functions. This creates a gap in your home’s security coverage. To avoid this scenario, replace the battery as soon as low battery warnings appear. Your system will continue alerting you until the battery is replaced.
Will replacing the battery erase my system settings?
No, replacing the battery should not erase your programmed settings. The panel’s memory is maintained by the battery itself during the replacement process. However, having your settings documented separately provides a safety net. If settings are lost, you can reprogram them using your documentation.
How long does a new battery take to fully charge?
A new ADT security panel battery typically requires 24 to 48 hours to reach full charge capacity. During this charging period, you may see low battery indicators on your panel, which is completely normal. Avoid triggering false alarms during this period, and allow the system to charge uninterrupted for best results.
What should I do with my old battery?
Never dispose of old batteries in regular trash. Lithium-ion and sealed lead-acid batteries contain materials that require proper recycling. Most retailers that sell replacement batteries accept old ones for recycling. Contact your local waste management facility for battery recycling options in your area.