4K Security Cameras: Expert Installation Guide
4K resolution security cameras have revolutionized modern surveillance systems, offering unprecedented clarity and detail that standard HD cameras simply cannot match. With four times the resolution of 1080p footage, 4K security cameras capture crisp, detailed images that enable better identification of threats, suspicious activities, and critical incidents. Whether you’re protecting a residential property, small business, or large commercial facility, understanding the installation process is essential for maximizing security effectiveness.
The shift toward 4K security camera systems represents a significant investment in cybersecurity infrastructure. High-resolution footage serves as both a deterrent and a forensic tool, providing law enforcement and security teams with the visual evidence needed to investigate incidents thoroughly. However, proper installation is crucial—poor camera placement, inadequate network configuration, or security oversights can compromise your entire surveillance system.
Understanding 4K Resolution in Security Systems
4K resolution, also known as Ultra HD, delivers 3840 x 2160 pixels of image data—a substantial leap forward from standard surveillance technology. This enhanced resolution provides security professionals and property owners with exceptional detail capture capabilities. When incidents occur, investigators can zoom into footage without losing critical image quality, revealing details that might otherwise remain hidden in lower-resolution recordings.
The benefits extend beyond simple image clarity. 4K security cameras enable broader field-of-view coverage with minimal blind spots, meaning fewer cameras may be required to monitor the same area effectively. This efficiency translates to reduced installation complexity and potentially lower system costs despite the higher per-unit camera price. Additionally, advanced video surveillance technologies increasingly incorporate AI-powered analytics that work more effectively with high-resolution feeds, enabling features like object recognition, behavioral analysis, and automated threat detection.
Pre-Installation Planning and Assessment
Before purchasing equipment or beginning installation, conduct a comprehensive security assessment of your property. Walk the perimeter and interior spaces, identifying high-risk areas requiring surveillance coverage. Consider entry points, parking areas, storage facilities, and locations where valuable assets are stored. Document existing lighting conditions—poor lighting requires cameras with superior low-light performance, and you may need to supplement with additional illumination.
Evaluate your network infrastructure requirements early in the planning phase. 4K cameras generate substantial bandwidth demands; a single 4K camera can consume 10-25 Mbps depending on compression and frame rate settings. Multiple cameras require proportionally higher network capacity. Measure distances from your proposed camera locations to your network infrastructure, as this determines whether you’ll use Ethernet cabling, wireless connectivity, or hybrid approaches. Check for potential obstacles like walls, metal structures, or electromagnetic interference sources that could affect signal quality.
Create a detailed site map indicating proposed camera locations, cable routes, and network connection points. This documentation serves multiple purposes: it guides installation technicians, helps identify potential problems before they occur, and provides a reference for future maintenance or system upgrades. Consult with CISA (Cybersecurity and Infrastructure Security Agency) guidelines for critical infrastructure protection if your facility handles sensitive operations.
Essential Equipment and Tools
Successful 4K security camera installation requires specific equipment and tools beyond the cameras themselves. You’ll need a network video recorder (NVR) or network-attached storage (NAS) system capable of handling 4K video streams. These devices must offer sufficient storage capacity—4K footage consumes approximately 100-300 GB per camera daily, depending on compression codecs and retention requirements.
Essential installation tools include:
- Cable management supplies: High-quality Ethernet cables (Cat6 or Cat6a for optimal performance), conduit, cable trays, and connectors
- Power infrastructure: Uninterruptible power supplies (UPS), power over Ethernet (PoE) injectors or PoE-capable switches, and backup power systems
- Mounting hardware: Weatherproof brackets, dome camera housings, wall anchors, and cable clips rated for outdoor use
- Testing equipment: Network cable testers, voltage meters, and bandwidth monitoring tools
- Safety equipment: Ladders, harnesses for elevated installations, and personal protective equipment
Invest in quality infrastructure components—cheap cables and connectors frequently fail, causing system downtime and requiring expensive emergency repairs. Professional-grade equipment ensures reliability and longevity of your surveillance investment.
Network Infrastructure Requirements
4K security camera systems demand robust network infrastructure that many older systems lack. Standard home or office networks often cannot handle the bandwidth requirements of multiple 4K cameras without experiencing performance degradation affecting both surveillance and regular internet operations.
Network requirements include:
- Dedicated network segmentation: Create a separate VLAN (virtual local area network) for security cameras, isolating them from general business or residential networks. This prevents surveillance traffic from consuming bandwidth needed for other operations and enhances security by limiting lateral movement if cameras are compromised.
- PoE switches: Power over Ethernet switches simplify installation by delivering both power and data through a single cable, eliminating the need for separate electrical runs to each camera location.
- Adequate bandwidth: Ensure your internet connection and internal network can handle simultaneous 4K streams. Most 4K systems require minimum 50-100 Mbps upload capacity for reliable cloud backup and remote monitoring.
- Network redundancy: Implement failover systems ensuring surveillance continues if primary network connections fail. Cellular backup connections provide critical redundancy for mission-critical installations.
- Quality of Service (QoS) configuration: Configure network QoS settings to prioritize security camera traffic, ensuring surveillance maintains consistent performance even during peak network usage.
Consult NIST guidelines on network security when designing your surveillance infrastructure, particularly if handling sensitive data or operating in regulated industries.
Step-by-Step Installation Process
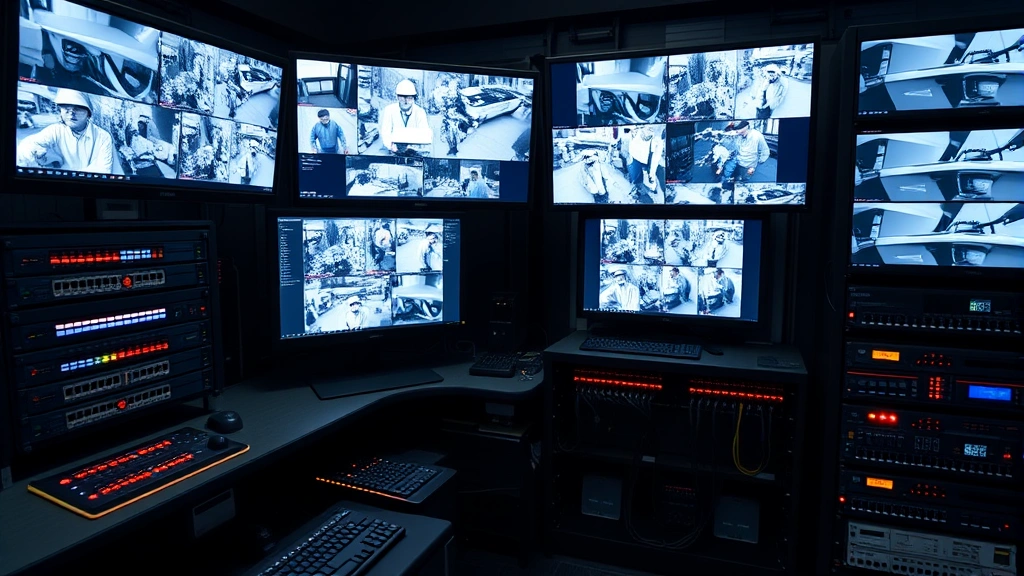
Begin installation by setting up your recording infrastructure—the NVR or NAS system that will store and manage all 4K footage. Position this equipment in a secure, climate-controlled location with adequate ventilation. Connect it to your PoE switch and configure network settings, including IP addressing, gateway configuration, and DNS settings. Ensure the recording system has redundant storage (RAID configuration) protecting against drive failures.
Next, prepare cable runs from your central equipment to each camera location. Measure distances carefully and purchase appropriately-sized cables—longer runs require heavier gauge Ethernet cables to prevent signal degradation. Route cables through conduit for protection against environmental damage and rodent interference. Clearly label all cables at both ends using a standardized labeling system for future troubleshooting.
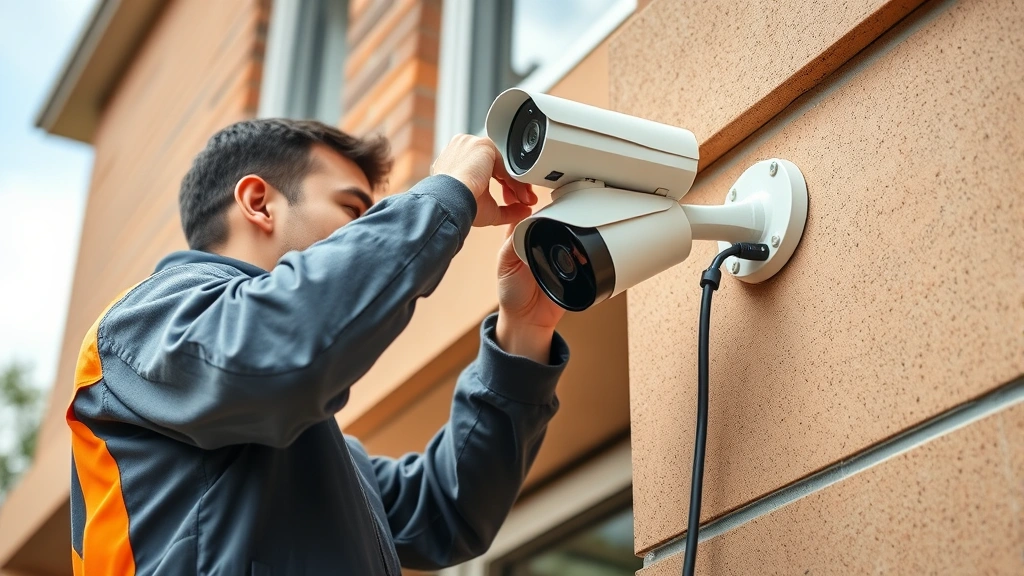
Install camera mounting hardware at each location, ensuring brackets are securely fastened to structural elements. For outdoor installations, use stainless steel or powder-coated hardware resistant to corrosion. Test mounting stability before attaching cameras—improper mounting causes vibration affecting image quality.
Connect each camera to its mounting bracket, then run the Ethernet cable from the camera to the nearest PoE switch connection. Power the camera and access its web interface to configure basic settings: IP address assignment, resolution (ensure 4K/2160p selection), frame rate (typically 24-30fps), and compression codec (H.264 or H.265). Test connectivity and verify video transmission to the recording system.
Configure each camera’s field of view, focus, and zoom settings to optimize coverage of the intended area. Test night vision functionality if the camera includes infrared capability, adjusting infrared intensity to prevent overexposure and glare. Verify that overlapping camera coverage eliminates blind spots while avoiding unnecessary duplication.
Camera Placement Strategies
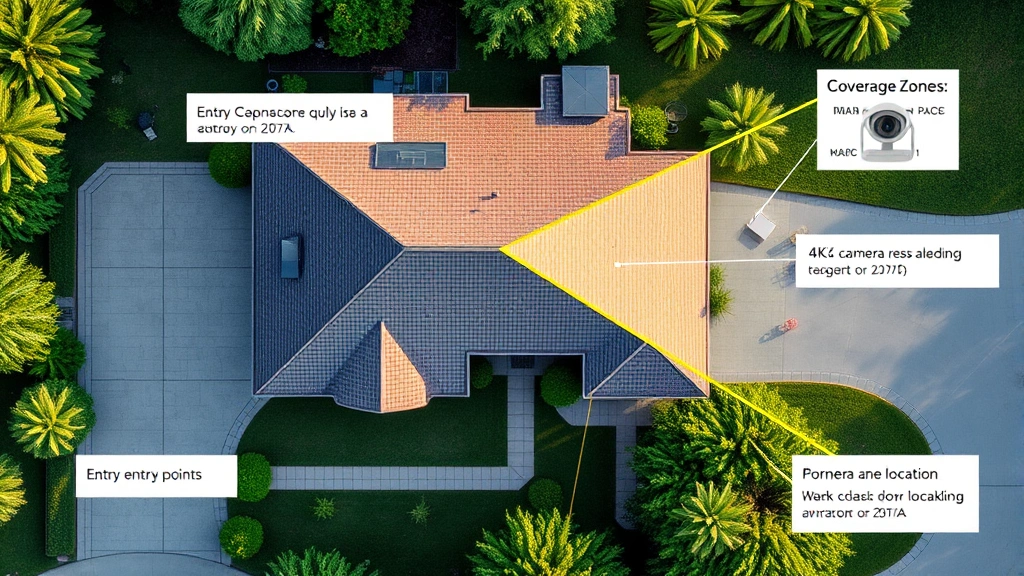
Strategic camera placement maximizes security effectiveness while minimizing bandwidth consumption. Position cameras at entry and exit points—doors, gates, loading docks, and windows—where they capture clear facial images of people entering or leaving the property. Mount cameras 8-10 feet high at these locations to capture frontal facial features and upper body details.
For perimeter monitoring, place cameras at corners and along long walls, angling them to eliminate blind spots. Outdoor cameras require weatherproof housings and consideration of sun position—avoid mounting cameras directly facing the sun, as this creates backlighting that obscures details. Position cameras to capture license plates of vehicles entering the property, mounting them approximately 4-6 feet high and angled appropriately for plate visibility.
Interior camera placement depends on facility type and security priorities. Retail environments benefit from cameras covering sales floors, checkout areas, and inventory storage. Offices should have cameras in common areas, reception areas, and server rooms containing critical infrastructure. Avoid placing cameras in private areas like bathrooms or changing rooms, as this creates legal liability and privacy violations.
Consider environmental factors affecting image quality: reflective surfaces creating glare, shadows from trees or structures, and seasonal weather changes. High-quality 4K cameras with wide dynamic range (WDR) technology handle challenging lighting conditions better than standard cameras, but proper placement remains essential for optimal performance.
Securing Your 4K Camera System
Installation doesn’t complete until you’ve implemented comprehensive security measures protecting your surveillance system from cyber threats. Unsecured cameras represent significant security vulnerabilities—compromised surveillance systems can be disabled by criminals, turned against your facility through malicious use, or leveraged as entry points for broader network attacks.
Change all default credentials immediately. Security cameras ship with default usernames and passwords that attackers readily exploit. Access each camera’s configuration interface and change credentials to complex, unique passwords stored securely in a password manager.
Implement network segmentation. As mentioned earlier, isolate surveillance systems on dedicated VLANs separate from general business networks. Use firewall rules restricting traffic between surveillance networks and other systems, preventing lateral movement if cameras are compromised.
Enable encryption for all communications. Configure cameras to use HTTPS/SSL encryption for web interface access and encrypted protocols for video transmission. This prevents attackers from intercepting video streams or configuration data in transit.
Apply firmware updates promptly. Camera manufacturers regularly release security patches addressing known vulnerabilities. Establish a regular update schedule and test patches on non-critical systems before deploying to production cameras. Subscribe to security advisories from your camera manufacturer to stay informed of emerging threats.
Implement access controls. Restrict who can access camera feeds and configuration settings. Use role-based access control (RBAC) limiting permissions based on job responsibilities. Audit access logs regularly to identify unauthorized access attempts.
Enable two-factor authentication. For remote access to surveillance systems, require multi-factor authentication combining passwords with time-based one-time passwords (TOTP) or hardware security keys. This dramatically reduces the risk of unauthorized remote access even if credentials are compromised.
Consult NIST Cybersecurity Framework recommendations for implementing security best practices in your surveillance infrastructure. Consider engaging professional security consultants to audit your system, particularly if you operate critical infrastructure or handle sensitive information.
Maintenance and Optimization
Post-installation maintenance ensures your 4K security camera system continues performing optimally throughout its operational lifetime. Establish a regular maintenance schedule addressing several key areas:
Lens and housing cleaning: Dust, spider webs, and environmental debris accumulate on camera lenses, degrading image quality. Clean outdoor camera lenses monthly and more frequently in dusty environments. Use microfiber cloths and appropriate lens cleaning solutions, avoiding abrasive materials that scratch optics.
Storage management: Monitor recording system storage capacity regularly. 4K footage consumes storage rapidly; implement automated deletion policies retaining footage for appropriate periods based on your security requirements and legal obligations. Many jurisdictions require 30-90 days minimum retention.
Network performance monitoring: Use network monitoring tools to track bandwidth consumption and identify performance bottlenecks. If cameras consistently exceed bandwidth allocations, implement video compression optimization or upgrade network infrastructure.
Firmware and software updates: Maintain a regular update schedule for cameras, NVR systems, and associated software. Security updates address emerging vulnerabilities, while feature updates often improve performance and reliability.
Backup and disaster recovery: Implement automated backup systems protecting recorded footage against hardware failures or ransomware attacks. Maintain offsite backups of critical footage ensuring recovery capability if your primary system is compromised.
Regular testing: Periodically test camera functionality, motion detection capabilities, and alert systems. Verify that cameras maintain focus and proper color balance over time. Test remote access capabilities to ensure authorized users can retrieve footage when needed.
FAQ
What bandwidth does a 4K security camera require?
A typical 4K security camera requires 10-25 Mbps depending on resolution, frame rate, and compression codec. H.265 compression reduces bandwidth requirements by approximately 50% compared to H.264. Multiple cameras require proportional bandwidth; five cameras might consume 50-125 Mbps total. Adequate network capacity is essential for reliable surveillance without impacting other network operations.
How much storage do 4K cameras need?
4K footage requires approximately 100-300 GB per camera daily, depending on compression and resolution settings. A 4-camera system might require 400-1200 GB daily storage. For 30-day retention, calculate 12-36 TB minimum storage capacity. Implement RAID configurations for redundancy and consider cloud backup for critical footage.
Can I use existing Ethernet cables for 4K cameras?
Existing Cat5 cables may work for short distances but don’t provide optimal performance for 4K systems. Cat6 or Cat6a cables are recommended for reliable 4K transmission, particularly over longer distances. If upgrading existing systems, replace older cabling to ensure consistent performance.
Do 4K cameras work in low light conditions?
Quality 4K cameras with infrared night vision function effectively in low light, though image quality may decrease compared to daylight performance. Cameras with superior sensor technology and wide dynamic range handle low-light scenarios better. Supplemental lighting improves performance in areas with consistently poor lighting.
How do I secure my 4K camera system from hackers?
Implement multiple security layers: change default credentials immediately, enable encryption for all communications, implement network segmentation isolating cameras from other systems, apply firmware updates promptly, use strong access controls with multi-factor authentication, and monitor access logs regularly. Consider professional security audits to identify vulnerabilities in your specific installation.
What’s the difference between NVR and DVR systems?
NVR (Network Video Recorder) systems work with IP cameras and offer superior flexibility, scalability, and remote access capabilities. DVR (Digital Video Recorder) systems use analog cameras with coaxial cabling. For 4K systems, NVR is the appropriate choice, as 4K cameras are IP-based. NVR systems integrate more easily with modern network infrastructure and security protocols.